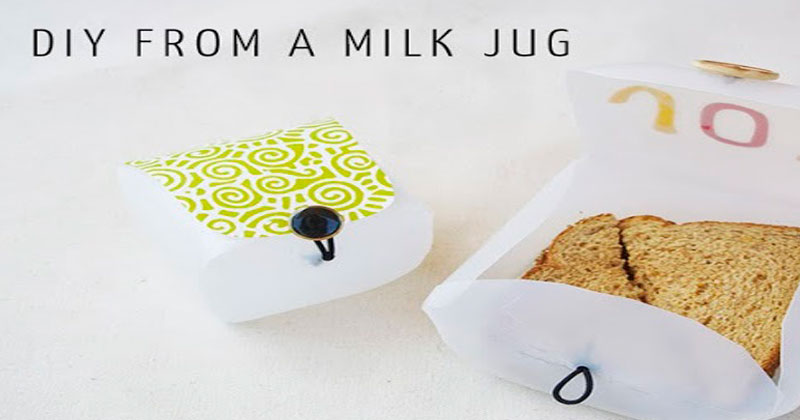
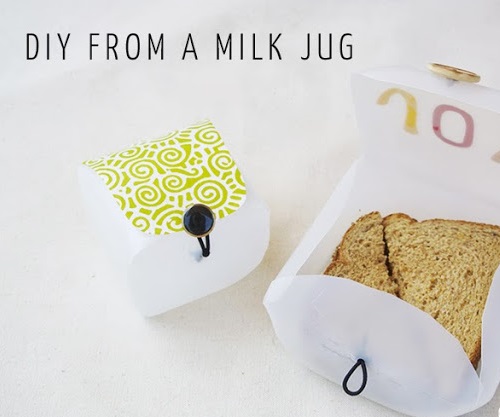
A milk jug makes a great lunch box, because not only is it food-safe, but it is the perfect size to keep your sandwiches from getting squished! Plus it will cost you about $1 to make! It can also be used as a container to organize all your little goodies. And the smaller milk jugs make the perfect on-the-go boxes too.
Now, the kids have another reason to finish their milk!
Materials:
• Empty milk jug
• Sharpie or marker
• Scissors
• Button
• Threading needle
• Embroidery floss
• Elastic hairband
• Decorative Cover (optional): Decorative scrapbook paper, Mod Podge, Brush


Steps:
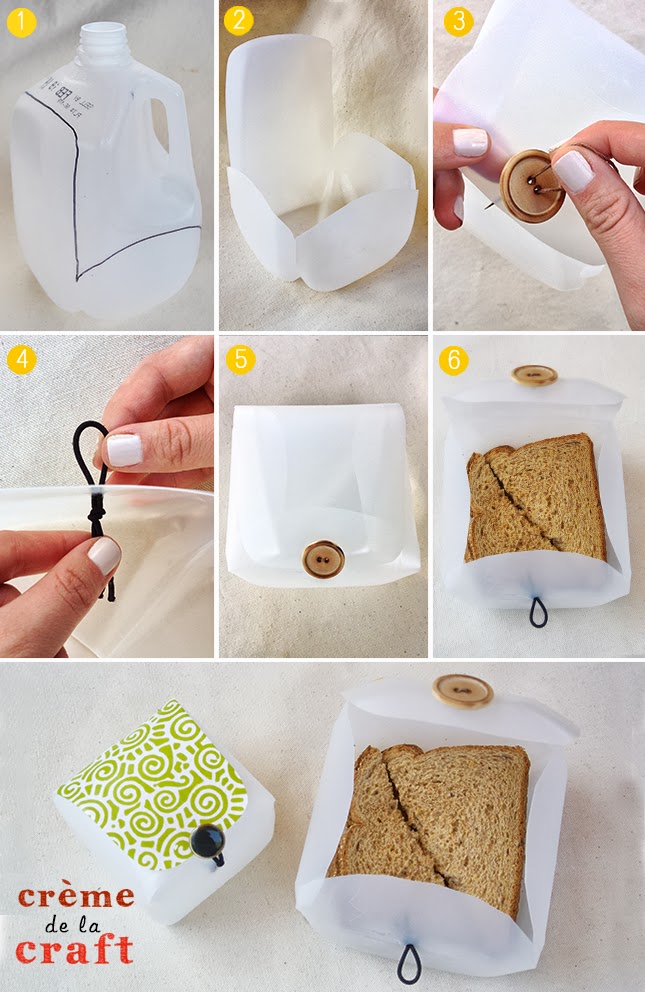
• Rinse out the milk jug and peel off the label. If any residue remains, run it under hot water and scrub away with a dish sponge.
• To create the flaps, use a marker to draw four half circles, one on each side of the jug. Make one side as tall as possible to create the lid (see image above).
• Cut along the inside of the lines and discard the remaining pieces.
• Bend down all four flaps so it starts to take the form of a container. If it doesn’t fold properly, try making longer slits on each corner of the milk jug.
• To create a button loop closure, sew on a button on the top lid.
• Directly underneath on the bottom base of the milk jug, pierce a hole with the edge of your scissors. Run a hairband halfway through, knotting the end from the inside of the container to hold in place.
• Optional: To personalize the container, decoupage your favourite decorative paper on the lid using Mod Podge, following the directions on the bottle.
Source & Credits:cremedelacraft
Also Read: 14 Simple DIY cards For Mother’s Day 2018
Post Your Comments