These tutorials are quite simple and can be done with the things you’d find right at home. So, read on to get pretty nails!
Bow Nail Art Tutorial
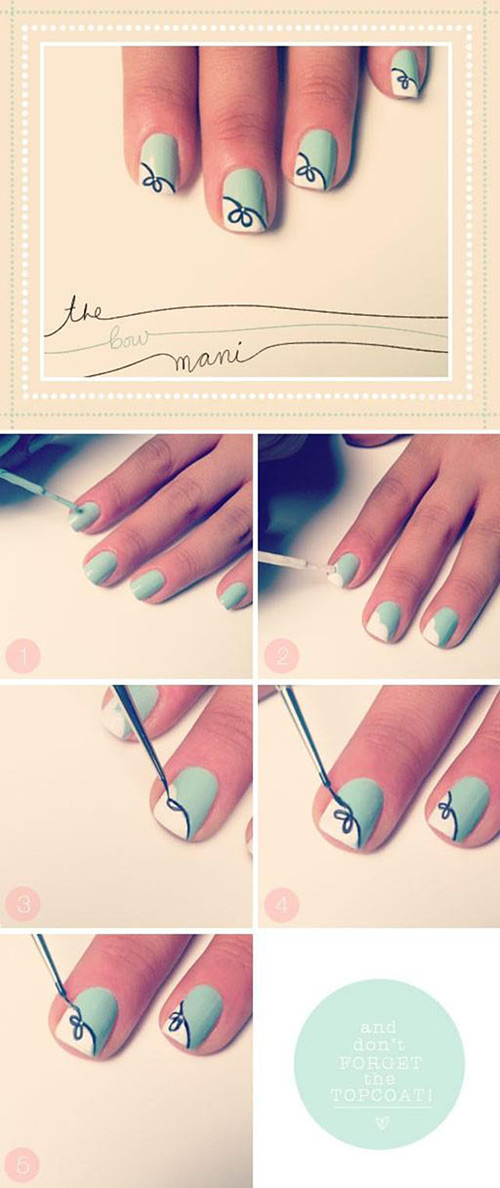
What You Will Need
- Sky blue nail polish
- White nail polish
- Black nail polish
- Nail striper or a very fine paintbrush
How To Apply?
- Start by painting all of your nails with the sky blue shade as your base colour.
- Paint over it with white in a heart shape as shown in the image.
- Using a nail striper or a paintbrush dipped in black nail polish, follow the shape where
- the white and blue meet and create two loops at the centre so that it looks like a bow.
- Seal it with a top coat, and you are good to go!
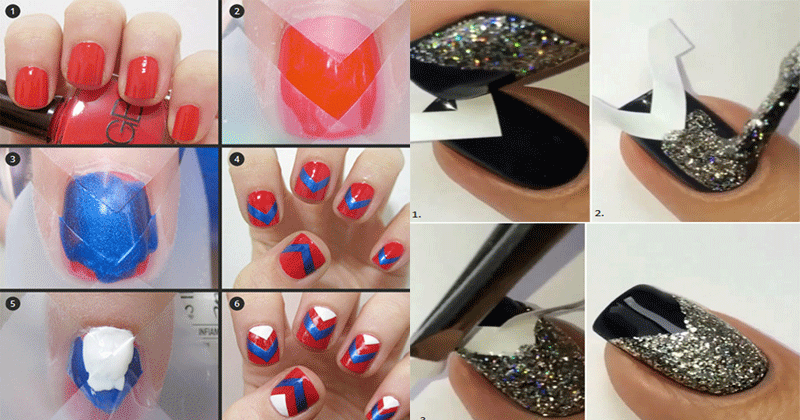
Chevron Nail Art Tutorial
![]()
What You Will Need
- Red nail polish
- White nail polish
- Blue nail polish
- Tape
How To Apply?
- Use red nail polish as the base for the chevron nail art.
- Strategically place the tape so that it creates a chevron stencil.
- Paint over it with the blue polish.
- Wait for a minute or so to remove the tape.
- Now place the tape as shown near the cuticle and paint the area with white.
- Again, wait for a minute before pulling off the tape, and seal it all with a top coat.
Glitter V-Tip Nail Art Tutorial
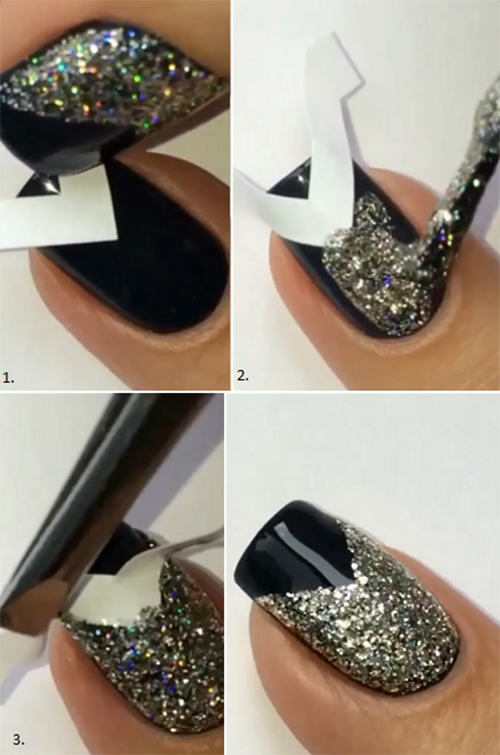
What You Will Need
- Black nail polish
- Silver glitter nail polish
- A ‘V’ shaped sticker or a piece of tape.
How To Apply? - Paint all your nails black as the background colour.
- Place the V sticker or the corner of a piece of tape near the tips as shown.
- Paint the bottom half with the glitter polish.
- Wait for a minute before you carefully pull away from the tape or sticker.
- Finish it off with a top coat.
Stripes and Lines Nail Art Tutorial
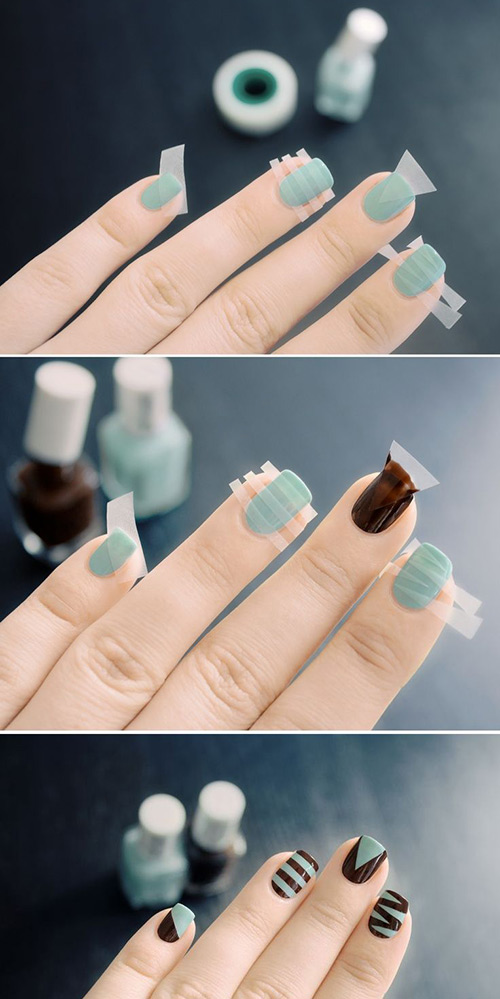
What You Will Need
- Pastel blue nail polish
- Brown nail polish
- Tape
How To Apply? - Start with the pastel blue as your base.
- Once it is fully dry, you can begin the placement of your tape.
- On the pinky, place it diagonally.
- Cut up thin stripes for the ring finger.
- Create a ‘V’ shape from the tape for the middle finger.
- Create very sharp angled triangles with the tape and place them on the index finger as shown.
- Similarly, create a design for the thumb finger.
- Now, paint over the tape stencils you just created with brown nail polish.
- Wait for a minute or so for the nail polish to dry a little and then carefully remove the tape.
- Voila! You have yourself a fun manicure!
Monochrome Polka Dots Nail Art Tutorial
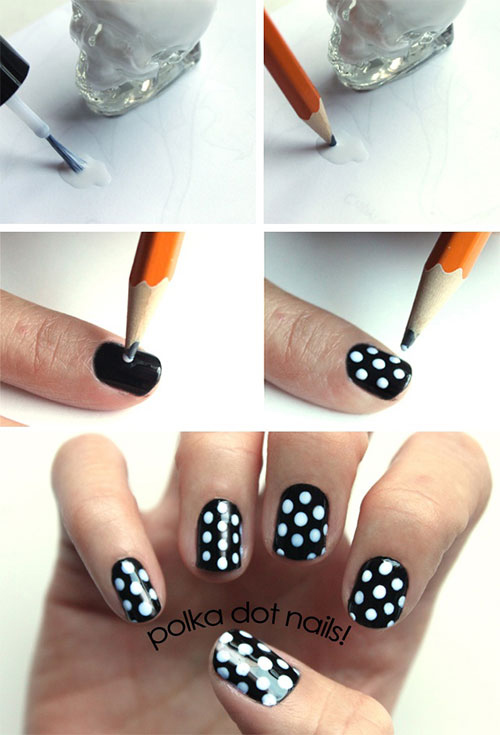
What You Will Need
- Black nail polish
- White nail polish
- Dotting tool, bobby pin or pencil.
How To Apply? - Paint all of your nails black.
- Using a dotting tool, the back of a bobby pin or a pencil dipped into white nail polish, create dots.
- It’s as easy as that! Finish with a top coat.
Also Read: Surprisingly Simple DIY Nail Art Hacks
Post Your Comments