Everything about this nail art design is so fresh and youthful. The colour combination is great, and it can be pulled off as the perfect summer nail look. You can also use a different set of nail colours if you’re aiming for a different look.
They are so pretty to look at and perfect for almost every occasion. If you want to nail the glitter mani trend, try out these things:
- Gradient Glitter Nails
This is a very versatile design, and you can use any colour of your choice for this look. You want to pick a fine glitter polish that takes about 2-3 coats to be opaque. If you wish, you can also add another glitter polish with chunkier bits of glitter. This is a great design for special occasions, such as weddings or parties.
DIY Step-By-Step Process
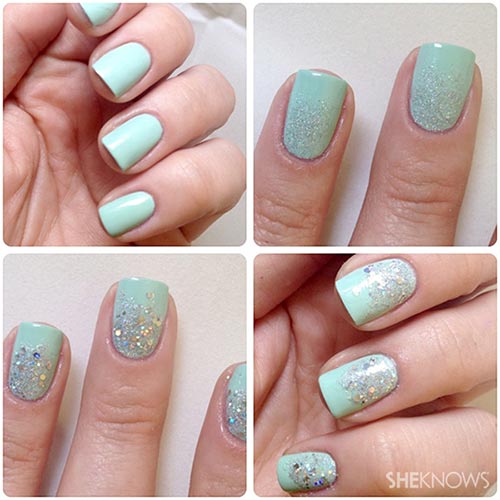
Step 1: Paint your nails in a mint green shade of nail polish. We’ve picked American Apparel in the shade ‘Office.’ If you prefer a darker shade, go in with the colour of your choice. Make sure you apply two coats of your desired nail polish shade.
Step 2: Use the fine glitter polish first like China Glaze’s ‘Glistening Snow.’ To get a super thin coat, wipe most of the nail polish off the brush. Paint from your cuticle to around halfway up the nail.
Step 3: Gently dab at the finish line to make it look scattered and uneven. Let this dry.
Step 4: Use your chunkier glitter polish and dab the glitter over the first coat to add dimension to your gradient.
Step 5: Finish your manicure with a top coat!
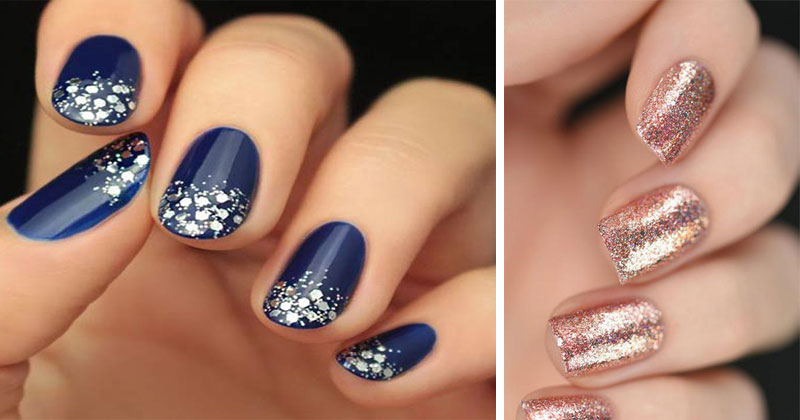
- Holographic Rose Gold Nails

This holographic rose gold nail design is all you need to glam up your hands and outfit. It’s super easy to recreate, and rose gold is in vogue right now.
DIY Step-By-Step Process
Step 1: Paint your nails with a base nail polish, so the glitter polish goes on evenly.
Step 2: Once your nails are completely dry, apply two coats of your holographic rose gold nail polish.
Step 3: Apply a high-shine top coat to finish the look.
You can also try other shades of holographic nail enamels like silver or gold to go with your mood and the occasion. These shades look extremely festive and fabulous on any skin tone.
- Milky Gold Gradient Glitter Nails
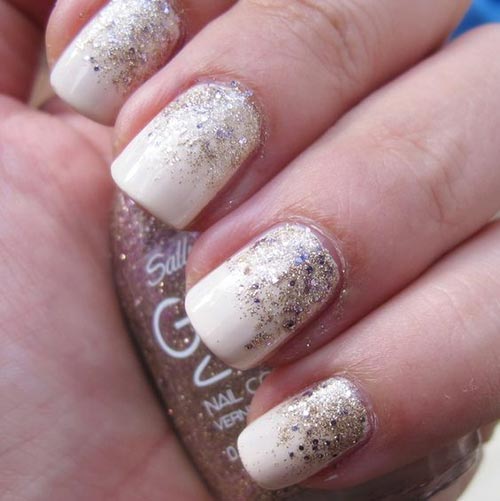
This is a classy glitter nail design that’s super simple to do. It is perfect for the holiday season, and you only need about 10 minutes to achieve this chic look.
DIY Step-By-Step Process
Step 1: Start by applying two coats of your base nail polish and wait for it to dry. You can use a shade like OPI’s ‘My Vampire is Buff’ or Lime Crime’s ‘Milky Way’ for your base.
Step 2: Apply a thin coat of glitter polish halfway across your nail and dab at the ends for a scattered effect. Wait for it to dry.
Step 3: Apply a coat of chunkier glitter polish on the first coat.
Step 4: Add a top coat like the China Glaze No-Chip Top Coat to finish.
- Royal Blue Jewel-Toned Glitter Nails
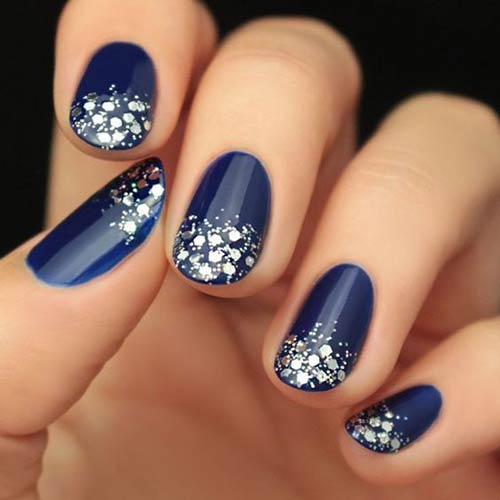
These sapphire blue nails are all you need for a classy event. This design is really easy to do, and it has got just the right amount of glitter to dazzle up that blue. You can recreate this with a different color if you wish. Love it? Here’s how you can do this.
DIY Step-By-Step Process
Step 1: Apply two coats of sapphire nail polish and allow it to dry.
Step 2: Apply a fine glitter polish to the edges of your nails and dab lightly to spread the glitter.
Step 3: Once this dries, apply a thin coat of chunky glitter polish over it.
Step 4: Top it off with clear nail polish to secure the design.
Also Read: How To Choose Nail Polish Colours For Different Skin
Post Your Comments