Menopause is the time that marks the end of menstrual cycles of women. It is a natural biological process and e can happen between 40s or 50s. Menopause is characterized by a one-year absence of menstruation. It has a particular impact on every woman in a different way.
Menopause is accompanied by a number of symptoms, such as irregular periods, hot flashes, sweating, trouble sleeping, mood swings, irritability, hip and back pain, and more.
Perimenopause is he transitional phase leading up to menopause. It usually starts several years before menopause. According to studies, the perimenopause stage might continue anywhere from 7 to 14 years in some women. Hormone levels start to decline during this stage. it results in irregular menstrual cycles, hot flashes, mood swings, sleep disturbances, vaginal dryness, and changes in libido.
As per health experts, yoga can helpful in managing perimenopause symptoms. Yoga offers multiple benefits for physical and mental well-being, which can alleviate some of the discomfort associated with perimenopause.
5 Yoga asanas to practice during perimenopause:
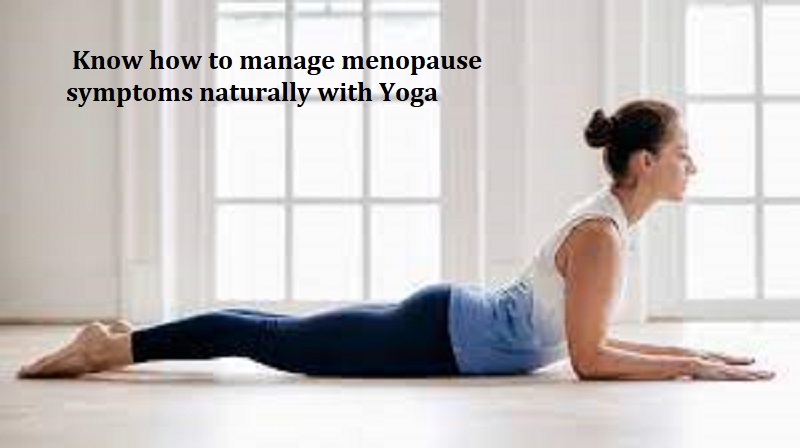
1. Adho Mukha Svanasana:
Lay flat on the ground facing the floor
Slowly lift your torso and form a mountain-like structure with your body
Your palms need to be farther apart and reaching outwards (in comparison to your shoulders)
On the other hand, your feet need to be placed next to each other
At this point, the only body parts touching the ground should be your palms and feet
Your face needs to be facing inwards and downwards, at the same angle as the arms
Your body must form a triangle (your hands, hips, and feet being the corners)
Hold this position for a few seconds and repeat 10 times at least
2. Uttanasana :
Stand straight
Now, slowly bend forward
The goal is to place your palms on the floor (folding your body in half)
Touching your toes may also be enough if you are unable to bend far enough. At this point, your face is supposed to be facing your legs, the top of your head facing the floor
Repeat this a few times in small intervals
Also Read: Know different types of relationship grief
3. Paschimottanasana:
Sit straight in your legs straight in front of you
In this position, your feet’s soles should be facing front
Slowly bring your torso closer to your legs and as far as possible
You can use your hands to hold your feet, this may increase how far you can reach
In this position, your stomach and chest are supposed to be touching your thighs
Your face can be facing the front or towards the legs, whichever may be comfortable
Hold this position for 10-20 seconds and sit back up
You can repeat it a few times based on your convenience
4. Sarvangasana:
In this pose, you require to hold your legs above your head
To do so, traditionally, you lay on your back and lift your legs above the ground at a 90-degree angle
You further, use your arms to push your legs to lift further
At this point, the only body parts touching the ground are your head, arms (from shoulder to elbows), and upper back
Your toes are supposed to be facing the sky
However, being able to do this asana comfortably takes time and practice. Hence, you can try using the support of a wall to rest your legs at a 90 degrees angle
To better perform this asana as a beginner, you can place 1-2 pillows under your lower back to further elevate the body with exterior support
5. Marjaryasana-bitilasana:
Get on your knees and hands
Lift your back upwards, forming a mountain-like structure
While you do that, make sure you push your face inwards, looking at your own torso
Now, push your back inwards, forming a ‘U’ position with your back
While you do that, look toward the ceiling
Repeat mountain motion with face inwards and then ‘U’ structure with face upwards for a minute
Post Your Comments